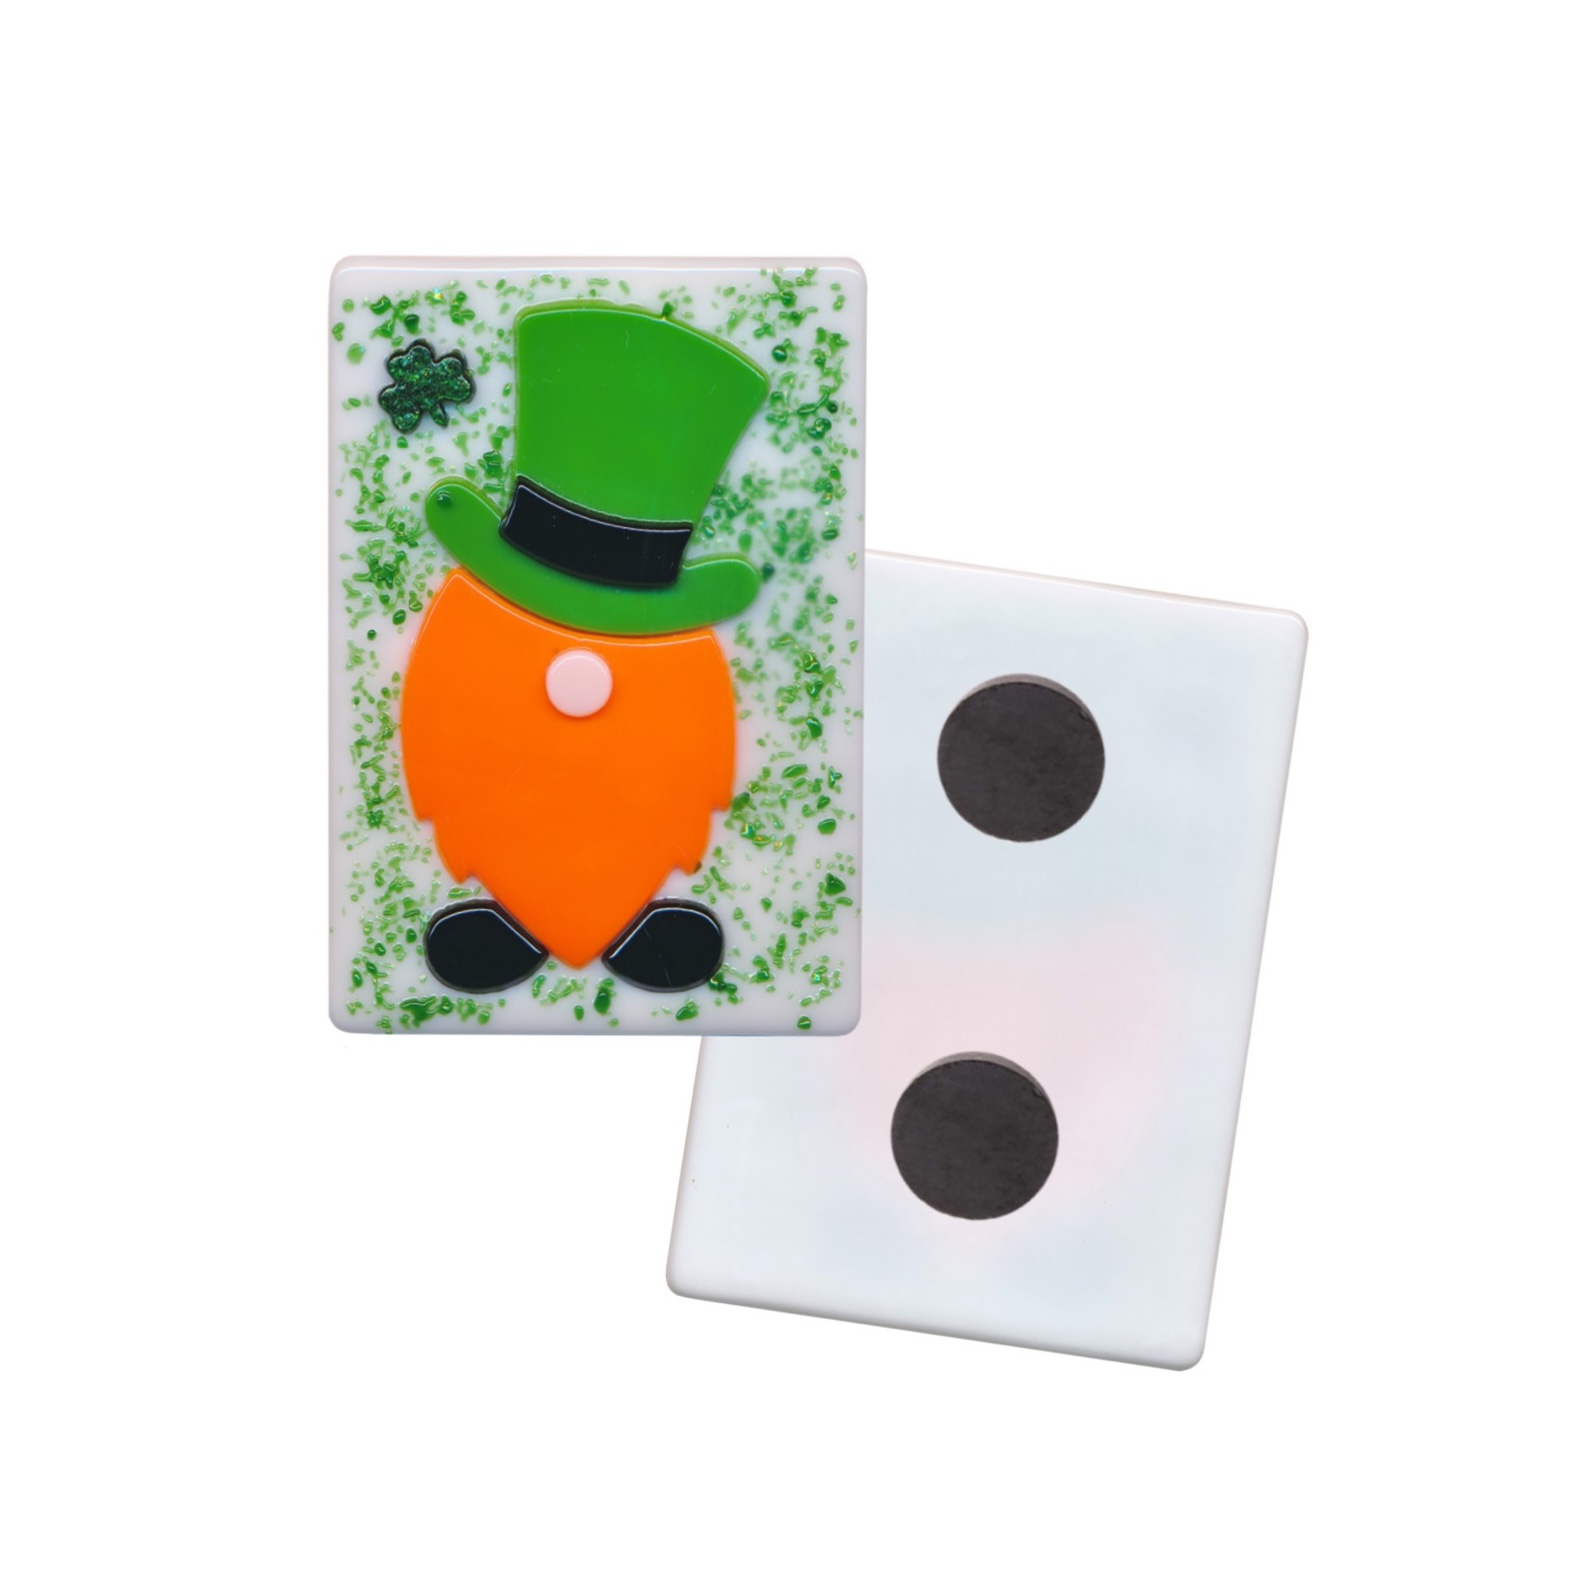
Every year on March 17th, people around the world celebrate St. Patricks Day. What was once originally a religious celebration, has over time become a day of parades, friendship, beer and pure magic! Our new pre-cut glass shape embodies the spirit of the most legendary mythical creature of St. Patricks Day and combines it with one of today's most popular creatures of folklore, the Leprechaun Gnome. Known for being small and unfriendly, leprechaun's are believed to possess pots of gold that can be found if you travel to the end of a rainbow! We aren't sure on the validity of that legend, but we're positive you'll feel like you struck gold this St. Patrick's Day when you have a Leprechaun Gnome Magnet hanging on your refrigerator!
Let's Make It
- Clean all glass pieces (including the leprechaun gnome, mini shamrock, and base) with dish soap and water, and dry them with a lint free cloth or paper towel.
- Configure the leprechaun gnome and mini shamrock on a glass base in the shape and color of your choice (we used a 3 1/2" x 4 1/2" opaque white rectangle).
- Decorate your design with glass frit (as seen in the picture above) or other embellishments as you desire. You could also use glass paint to design a background or even give your leprechaun gnome a face!
- Line the kiln shelf with thin fire shelf paper.
- Arrange your leprechaun gnome piece on the thin fire paper. If you're fusing multiple pieces, ensure they are at least 3/8" apart and 1/2" from the edge of the paper.
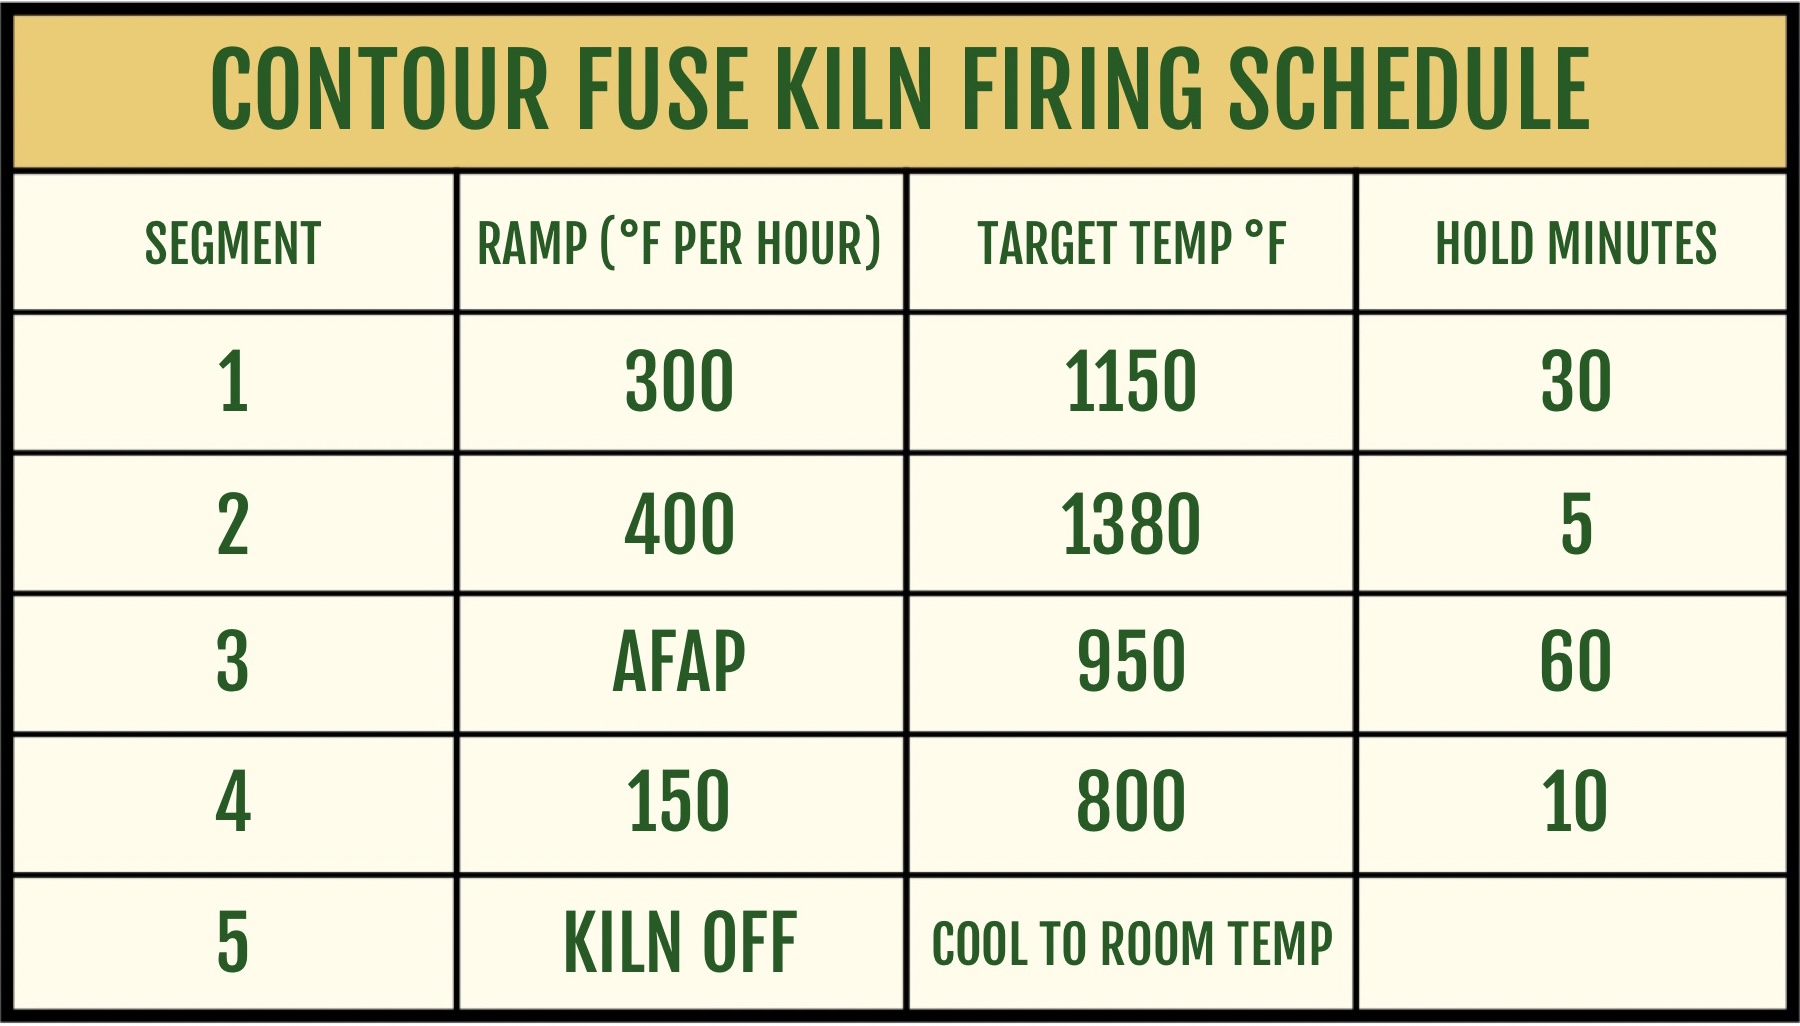
- Fire to a contour fuse. See schedule below.

- Once your leprechaun gnome has cooled, clean the back with soap and water. Dry thoroughly.
- Use a small amount of epoxy glue to adhere a magnet to the back. You can use a wide variety of magnets, but it is important to ensure they will be strong enough to hold the weight of your glass piece (we used two, 3/4" circular magnets).
- Allow the glue to dry for 24 hours before hanging. Enjoy!
Supplies
- S-112 Bullseye Thin Fire Paper (1)
- Glass Base (1)
- Frit & Embellishments (if desired)
- Magnets
- E-6000 Glue (or other epoxy glue)
